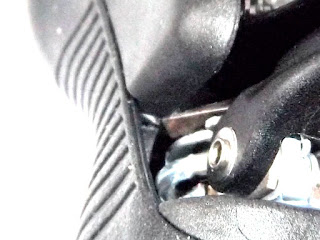
The Saetta frame comes with a 'braze-on' clamp for fixing the front derailleur and the hanger for the rear derailleur was already attached. The frame was actually shipped with a spare hanger - useful if you come off on a right-hand bend and squash the derailleur in towards the back wheel. In the past I've had to do this as a running repair but with the precise alignment required for the 10 speed system it looks like the accuracy needs to be more than just by eye. So that spare hanger may come in handy - in the UK we have a lot of roundabouts and we go around them clockwise which must increase the risk of this sort of accident.
The hardest part of fixing the rear derailleur was tightening the fixing bolt to the correct torque. The bolt head is recessed in a narrow channel that will not allow me to put the hex socket in so I had to do it by feel with a regular Allen Key.
The Centaur brakes appear identical in the box and it is hard to see, on first look, which is the front and which is the back. The difference is so obvious to the experienced bike mechanic that it seems not to warrant a mention in the instructions. I'm glad to see I'm not the only one who felt the need to consult the internet to make sure, as evidenced by this bike forum post. The answer is of course that the front brake has a longer bolt to allow it to pass through the fork. Given that fork widths vary, and carbon forks tend to be a bit fat at this point, you may need to get a longer nut to make contact with the brake bolt. Both Campagnolo and Cinelli thought of this and I had multiple sizes shipped with the brakes and the correct size bolt shipped with the frameset - another item for the spares box but all good.
If I thought the rest of the job would go really quickly I was wrong. The next step is to put the Ergo levers on the bars and connect them up to the derailleurs (you need to do this before you put the chain on because you are going to need to operate the derailleurs as part of the chain installation procedure - more on that next time). It is always nice to learn a new word (especially one that dictionary.com doesn't know about yet) and I soon discovered that a 'brifter', far from being the long lost relative of the old Raleigh Grifter, was in fact a common synonym on the internet for 'lever' in this context; being a simple contraction of brake/shifter.
The instruction leaflet that comes with the Campagnolo brifters merely says "Raise the support cover to expose the securing screw" and shows a picture which appears to show the base of the rubber hood being peeled back (as it will be when you install the bar tape) far enough to get a clean line of sight into the head of the bolt which turns out to be a T25 torx head and not a plain hex. I believe this is impossible. I would not want to attempt this in a cool environment as I felt I needed all the warmth of my house, combined with the warmth of my hands to make the rubber supple enough to peel easily without tearing but try as I might I could not expose the bolt as shown in the diagram.
I'm not the only one, there are numerous threads in bike discussion forums where people are having trouble with this point. My favourite is this one, which is a little old now but the technology and the lever shapes are basically the same: Campagnolo Ultra-Shift Mounting Bolt (or: stripping is awesome). This thread makes a couple of important points.
(1) Don't try and get in from the base of the hood, instead, go in from the top of the hood. I love this report in the above thread from someone who sought official advice: "The man with whom I spoke at Campy, however, advised instead pulling up the hood from the top of the lever and pushing it back toward the base (i.e., entirely opposite from what the instructions say)".
(2) Even with the hood completely clear of the bolt it may be impossible to get a straight line down to the bolt head for a torque wrench and you risk stripping the soft alloy bolt if you apply too much force this way. Another quote from the above thread: "I wrestled with the hoods and managed to get enough clearance so that I could get the wrench in straight (or as straight as you can given the placement of the bolt on the body), but I still had that trouble".
There is now an excellent article on BikeRadar.com on How to Fit Campagnolo Ergo Levers. It shows the solution to (1) and has a fabulous photo of the small rubber 'nib' being removed before the hood is peeled back from the top. Here is my feeble attempt at a similar picture:
 |
| The left-hand lever showing a narrow screw driver head inserted through the lever to free the nib |
 |
| Close up of the screw driver being used to push the rubber nib back into place |
 |
| T25 wrench inserted under the hood to tighten the clamp bolt |

No comments:
Post a Comment